Usage & Billing
The Usage & Billing page lets you manage your account balance, payments, and invoices.
You can:
- view your current balance
- add funds to your account
- check transaction history
- download invoices
- access the customer billing portal
- choose and book subscription plans
- upgrade or cancel subscriptions
Account Overview
At the top of the page you will see:
- Account Balance – available funds for usage
- Monthly Average – your average monthly spend
- Top Up button – add funds to your account
- Customer Portal button – open your invoice dashboard
- Manage your subscription - information about your current subscription
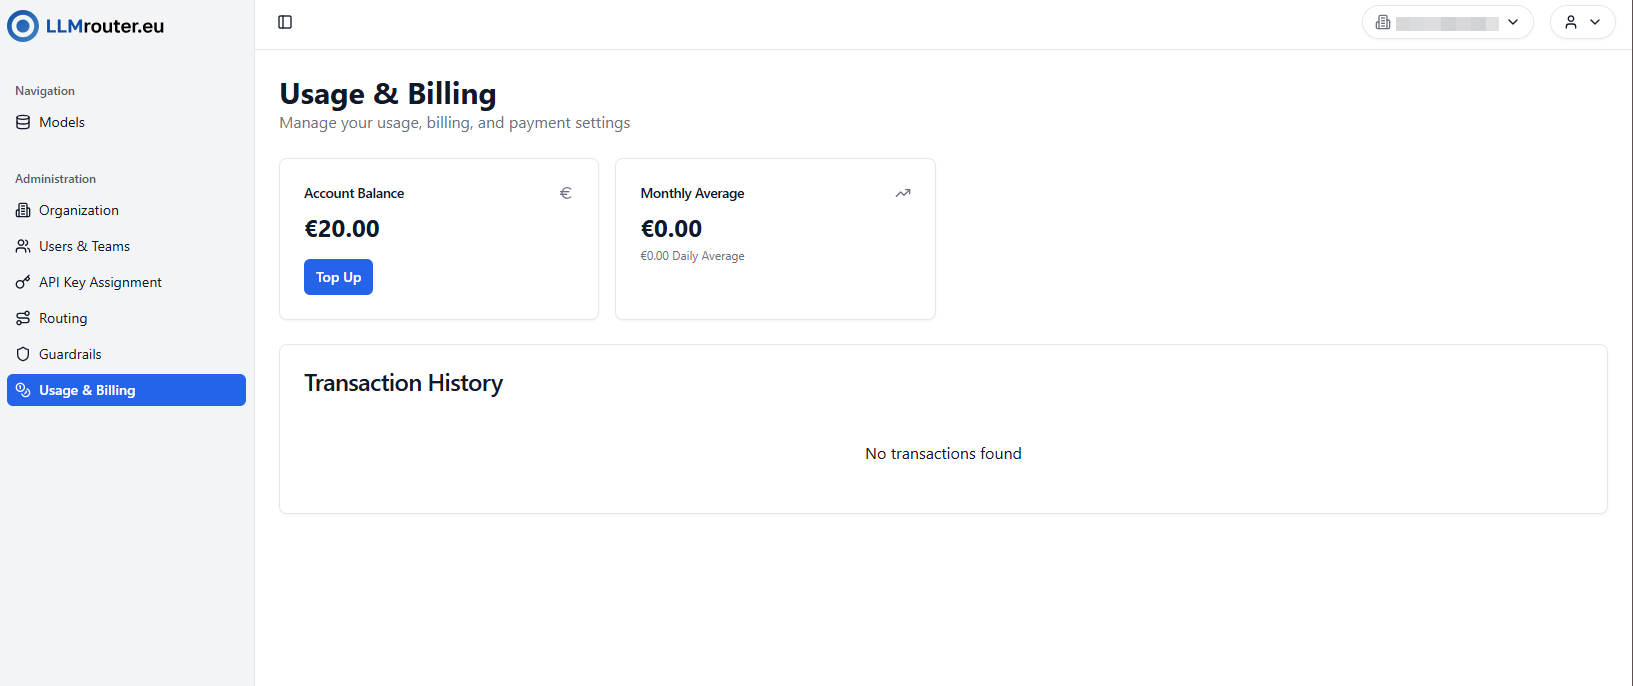
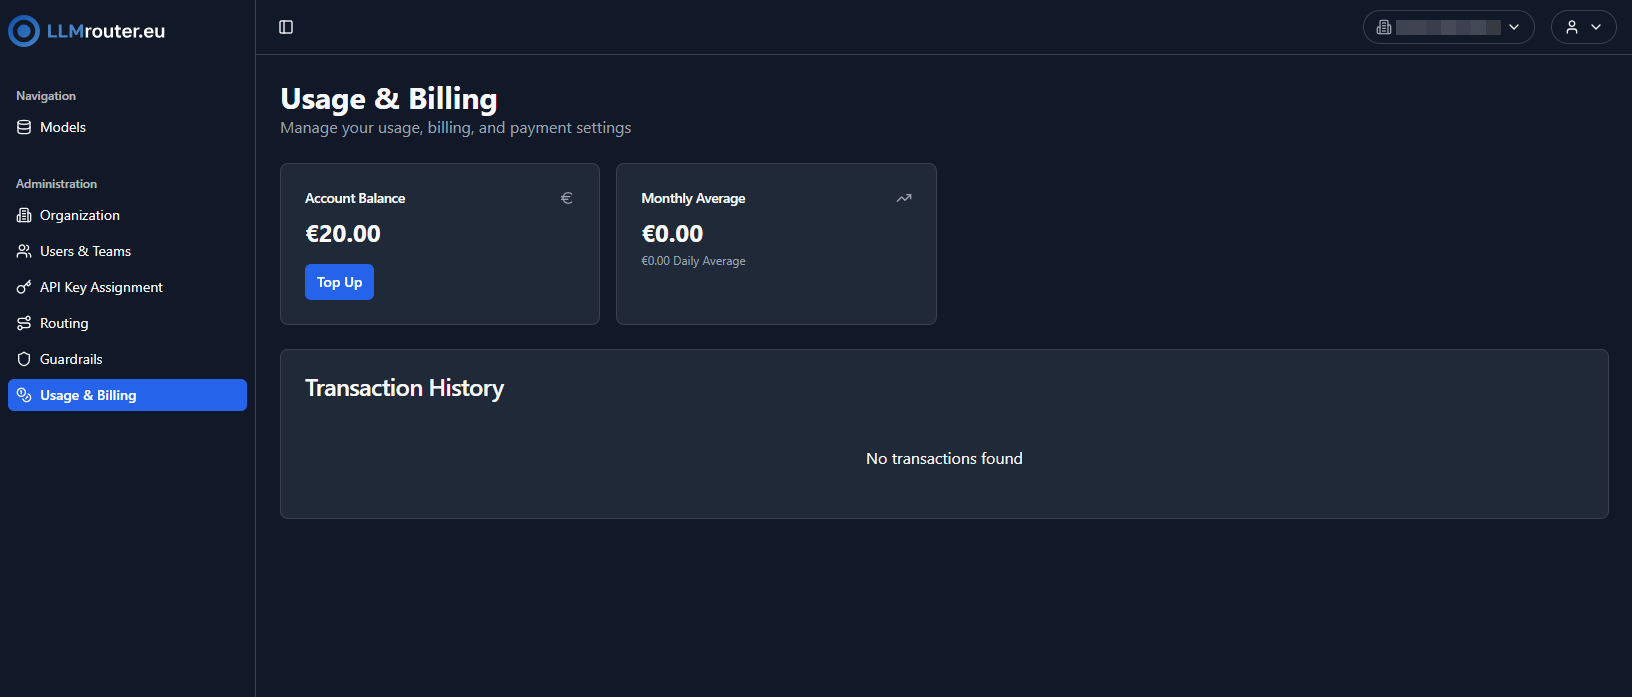
Figure 1: Usage & Billing overview with balance, top-up button, customer portal access ans subscription status.
Adding Billing Details
Before topping up your account for the first time, you must provide billing information.
Required information
- Company name
- Street address
- Postal code and city
- Country
- VAT number
- Invoice language
- Invoice email address
After saving your billing details:
- top-ups become available
- invoices can be generated
- the Customer Portal button becomes visible
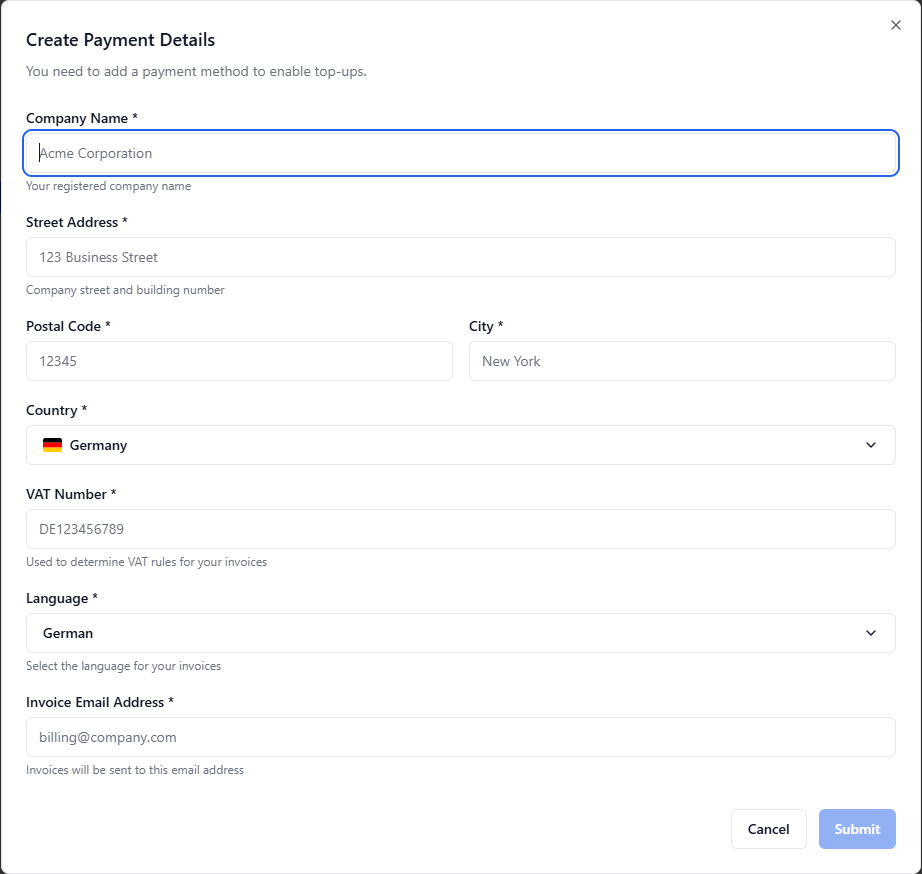
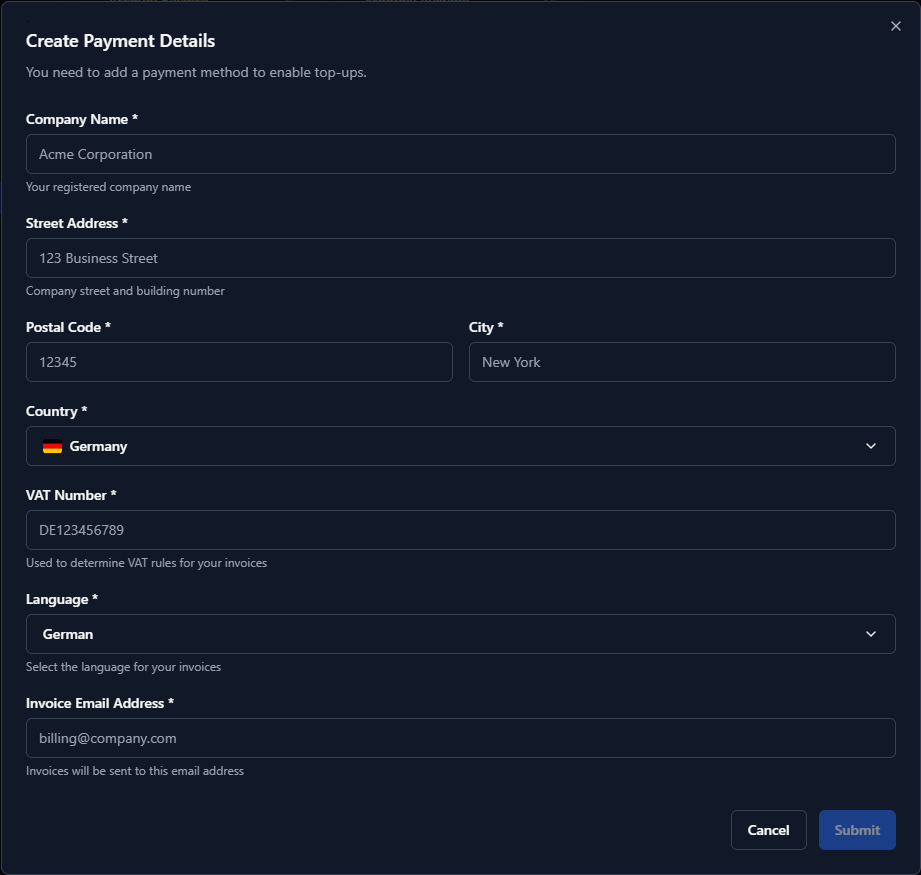
Figure 2: Billing details dialog required before the first top-up.
Starter Credit
If your organization has not added billing details yet, you may be eligible for a one-time €10 starter credit to test LLM Router.
How to claim the starter credit
You only need to do one thing: add your billing details (company, address, VAT, invoice email).
You can start the process in two ways:
- From the banner on the Usage & Billing page (if visible)
- Or via Top Up: go to Usage & Billing → click Top Up → if billing details are missing, you will be prompted to add them.
Even if you accidentally closed the banner, your organization can still receive the starter credit as long as billing details have not been provided yet.
Conditions
- One-time per organization
- Not a cash payout (non-refundable, non-transferable)
- The credit is applied to your account balance and can be used for product usage
Topping Up Your Balance
To add funds:
- Click Top Up
- Select or enter an amount
- Confirm the payment
- Complete payment in the secure payment window
Payment Methods
The available payment method depends on the selected amount.
Card Payments (below €1,000)
- processed immediately
- includes processing fee
- VAT applied depending on company location
- balance updated automatically after payment
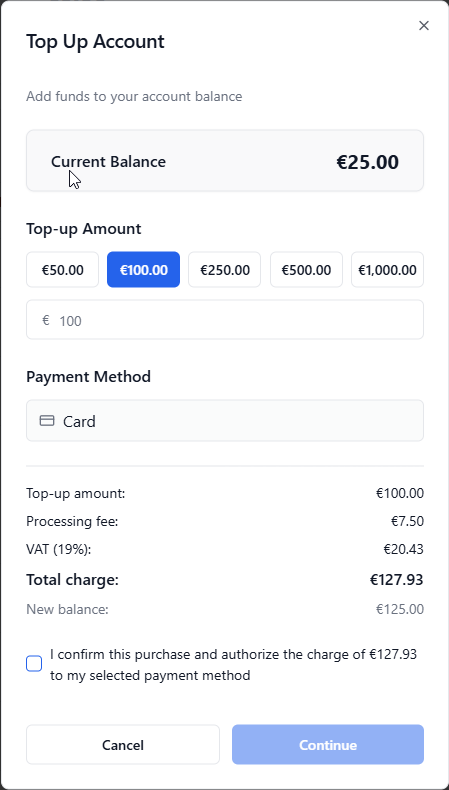
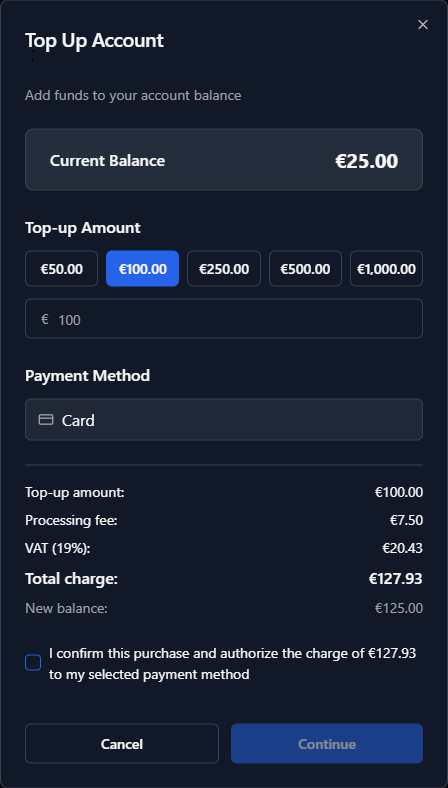
Figure 3: Top-up dialog showing card payment, price breakdown, and confirmation checkbox.
Invoice Payments (€1,000 or more)
- after clicking Continue, a support chat will open
- there you can send a request for a top-up via invoice
- our team reviews your request and issues the invoice
- once the payment is received, the balance is credited to your account

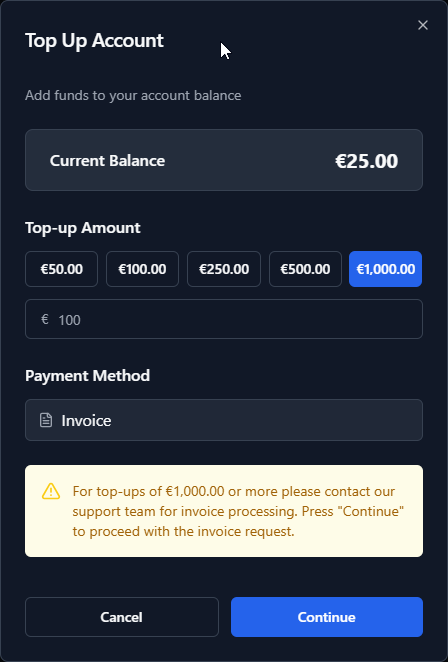
Figure 4: Top-up dialog showing invoice payment flow for large amounts.
VAT Handling
VAT is calculated automatically based on your company location.
Company located in Germany
- VAT 19% is added
- VAT calculated on top-up amount and processing fee
Company located outside Germany
- VAT 0%
- Reverse charge may apply
- the tax liability is transferred to the recipient of the service
The payment summary always shows:
- top-up amount
- processing fee
- VAT amount
- total charge
- expected new balance
Payment Processing
After clicking Continue, you are redirected to the secure payment flow.
Possible outcomes:
Completed
Payment successful.
Your balance is updated immediately.
Pending
Payment is still processing.
You can complete the payment later from the transaction menu.
Failed
Payment was not successful.
You can retry or choose another method.
Transaction History
The Transaction History table displays:
- payment status
- type (card or invoice)
- amount
- billing number
- date
- available actions
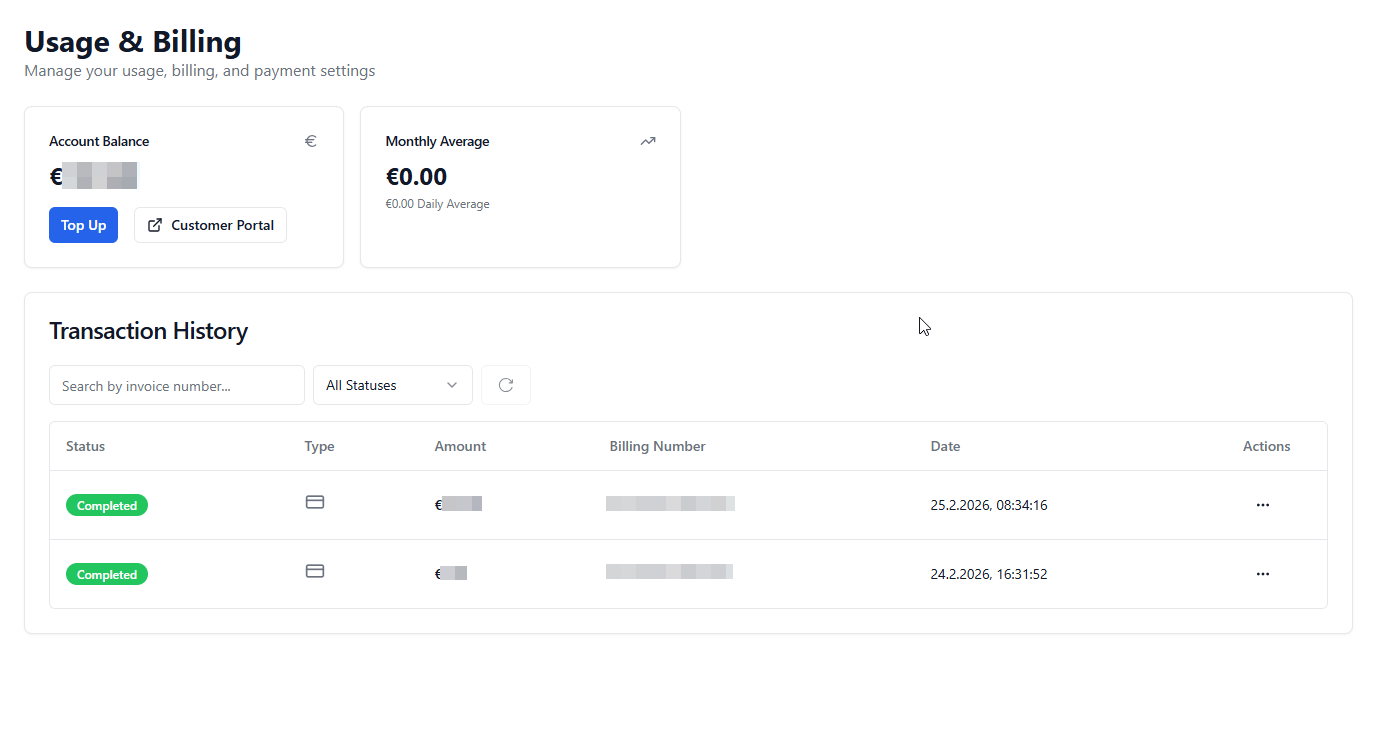
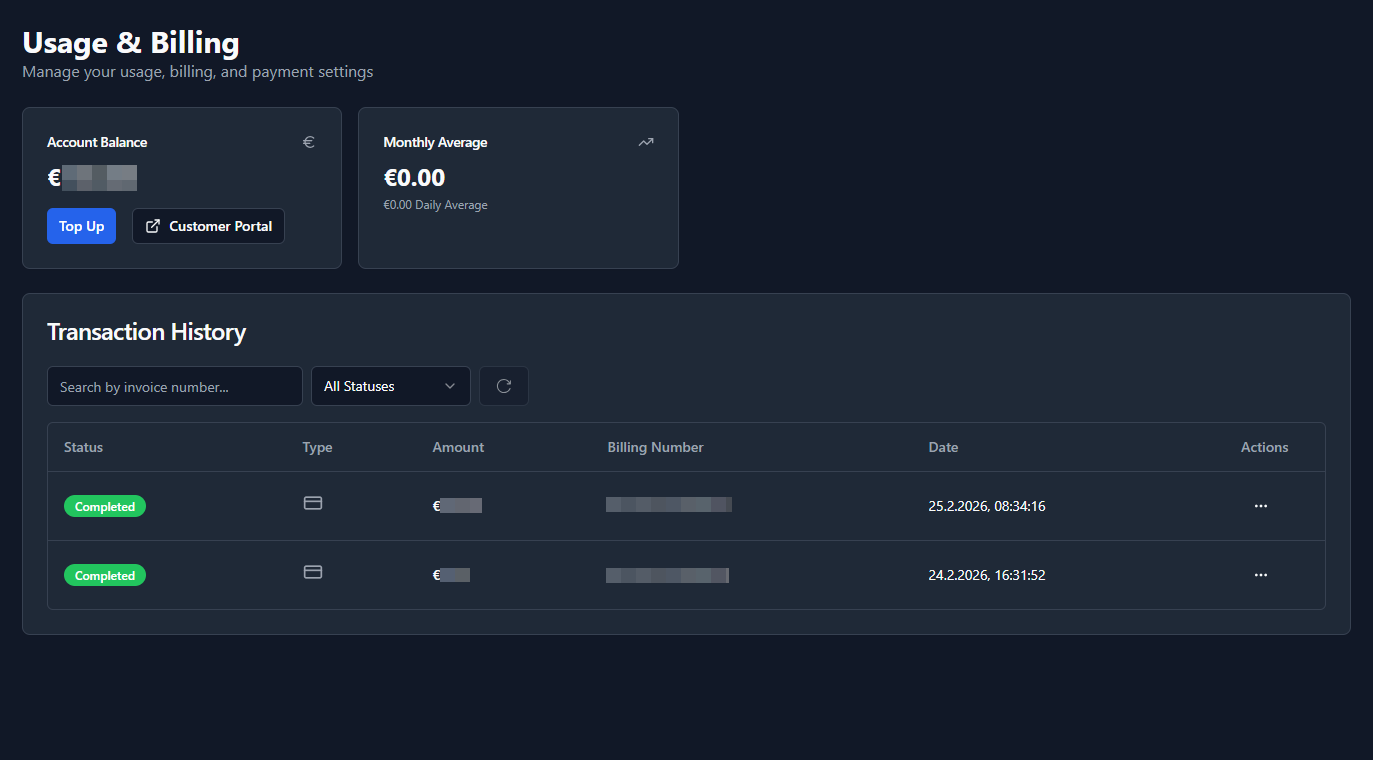
Figure 5: Transaction history showing completed, pending, and failed payments.
Completing a Pending Payment
If a transaction is still pending:
- Open the Actions (…) menu
- Click Complete payment
- Follow the payment instructions
Customer Portal
The Customer Portal provides access to your billing dashboard.
In the portal you can:
- view all invoices
- download invoice PDFs
- check payment status
- review billing information
Use the Customer Portal button on the overview page to open it.
Typical User Flow to top up your account
- Open Usage & Billing
- Add billing details (first time only)
- Click Top Up
- Select amount
- Confirm payment
- Complete payment in the payment window
- Funds appear in balance
- Invoice available in Customer Portal and will be send per email.
Subscription Plans
LLM Router offers multiple subscription plans depending on organizational needs.
Available plans include:
Monthly and Yearly Billing
Users can choose between:
- Monthly billing
- Yearly billing
Yearly billing includes a 10% discount compared to monthly pricing. Users with an active monthly subscription can upgrade to a yearly subscription at any time.
Downgrading from a yearly subscription back to monthly billing is currently not supported.
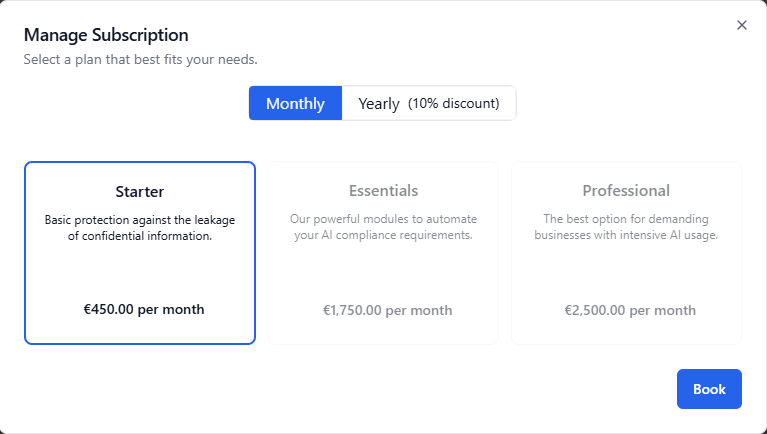
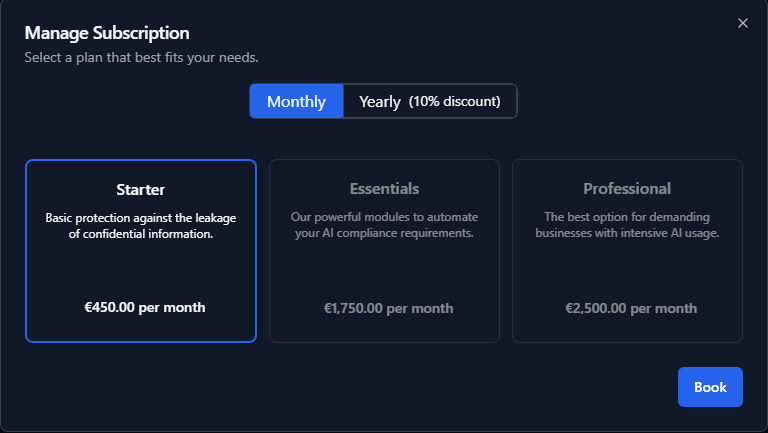
Abbildung 6: Subscription plans
Upgrading a Subscription
To upgrade a subscription:
- Open Billing & Usage
- Click Upgrade Subscription or Manage Subscription
- Select a subscription plan
- Choose monthly or yearly billing
- Confirm the subscription details
- Complete payment
After successful payment, the subscription becomes active immediately.
Subscription Confirmation
Before payment, a confirmation dialog displays:
- Selected subscription plan
- Billing period
- VAT amount
- Total price
Users must confirm the subscription before continuing to payment.
Active Subscription
After activation, the subscription section displays:
- Current active plan
- Billing status
- Next billing date
- Documentation link
- Available management actions
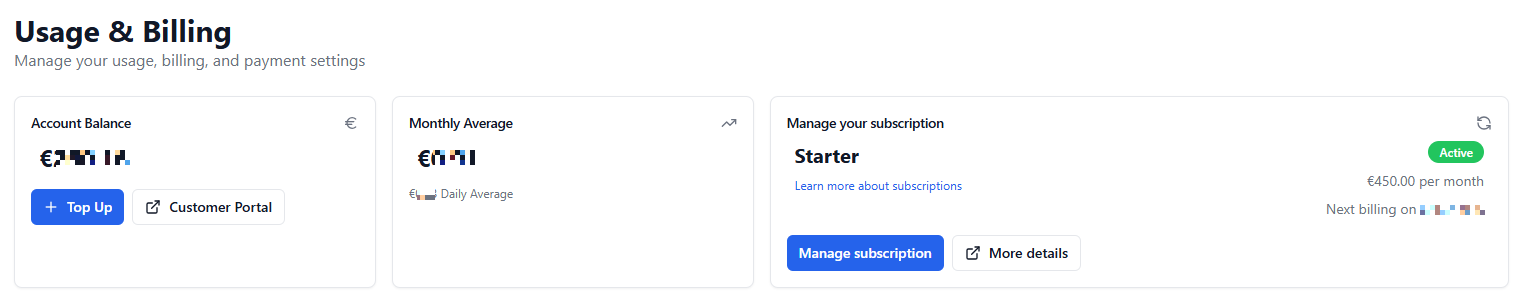

Abbildung 7: Current subscription information
Canceling a Subscription
To cancel a subscription:
- Open Manage Subscription
- Select Cancel Subscription
- Confirm cancellation
After cancellation:
- The subscription remains active until the end of the already paid billing period
- No refund is issued for unused remaining subscription time
- The subscription expires automatically after the billing period ends


Abbildung 8: The cancelled subscription